Pan-Seared Garlic Butter Steak: How to Make It Juicy and Tender Every Time
Introduction: The Allure of a Perfect Steak
Few dishes evoke the same level of satisfaction as a perfectly cooked steak. The sizzle of a hot pan, the aroma of garlic and butter, and the promise of a juicy, tender bite are enough to make anyone’s mouth water. Yet, many home cooks find themselves disappointed with dry, overcooked steaks or lackluster flavor. The truth is, achieving restaurant-quality pan-seared garlic butter steak at home is not about fancy equipment or exotic ingredients—it’s about technique. In this ultimate guide, we’ll break down every step to ensure your steak is consistently juicy, tender, and packed with flavor. From selecting the right cut to the final rest, you’ll learn the secrets that make all the difference.
Why Pan-Searing with Garlic Butter is the Best Method
Pan-searing is a classic technique that combines high heat with direct contact to create a flavorful crust while keeping the interior tender. When you add garlic butter to the mix, you introduce a layer of richness and moisture that enhances the steak’s natural juices. The butter basting process, where you spoon the melted butter over the steak, not only adds garlic and herb infusion but also helps to cook the steak evenly without drying it out. This method is efficient, requires minimal ingredients, and yields impressive results every time.
The Science Behind the Sear
The Maillard reaction is key to a great sear. When amino acids and sugars in the meat react under high heat, they create hundreds of new flavor compounds, resulting in that distinctive brown crust. To trigger this reaction, the meat surface must be dry and the pan must be hot enough (around 400-500°F). Moisture on the steak surface lowers the temperature and causes steaming instead of searing. That’s why patting the steak dry is the first critical step.
Why Butter Basting Locks in Juices
As the butter melts and foams, it creates a barrier that helps conduct heat gently to the steak’s surface. The fat from the butter also penetrates the meat slightly, adding moisture and flavor. By continuously basting, you ensure that the steak is coated in this flavorful fat, which prevents the juices from escaping too quickly during cooking. Combined with proper resting, this results in a steak that is succulent from edge to edge.
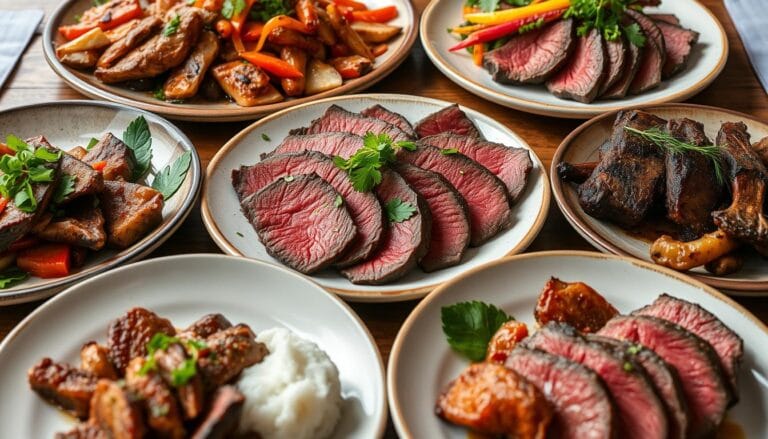
Selecting the Perfect Steak Cut
Not all steaks are suited for pan-searing. Choose cuts that are at least 1 to 1.5 inches thick to avoid overcooking the center before the crust forms. Ideal options include:
- Ribeye: Richly marbled with fat, ribeye is incredibly flavorful and stays tender due to the intramuscular fat.
- New York Strip: A leaner cut with a tight texture, it has a robust beefy flavor and a nice fat cap for rendering.
- Filet Mignon: Tender and mild, filet mignon is lean, so care must be taken not to overcook it, but the garlic butter adds necessary richness.
- Sirloin: A budget-friendly option with good flavor; look for top sirloin for better tenderness.
When buying, look for bright red meat with consistent marbling. Avoid steaks with excessive liquid in the package, as this indicates poor quality or age.
Essential Ingredients for Garlic Butter Steak
While the steak is the star, the supporting ingredients elevate it to new heights. Here’s what you’ll need:
- Steaks: 2 pieces, 1 to 1.5 inches thick, at room temperature.
- Salt: Kosher salt for seasoning; it adheres better and enhances flavor without over-salting.
- Black Pepper: Freshly ground for maximum aroma.
- High Smoke-Point Oil: Avocado, canola, or grapeseed oil for searing without burning.
- Unsalted Butter: 4 tablespoons; allows you to control salt levels and prevents the butter from becoming too salty during browning.
- Garlic: 4-5 cloves, lightly crushed to release flavors without mincing, which can burn easily.
- Fresh Herbs: Thyme or rosemary sprigs; they add earthy notes and fragrance.
- Shallot (Optional): Finely chopped for a subtle onion sweetness.
Equipment That Makes a Difference
Having the right tools ensures a smooth cooking process. Key equipment includes:
- Cast Iron Skillet: The gold standard for pan-searing. It retains heat exceptionally well, providing consistent high temperature for a perfect crust. Pre-seasoned is best.
- Tongs: For flipping the steak without piercing it, which would let juices escape.
- Basting Spoon or Brush: A large spoon works well for scooping butter; a silicone brush can also be used.
- Meat Thermometer: Highly recommended for accuracy; digital instant-read thermometers give quick results.
- Paper Towels: For drying the steak thoroughly.
- Resting Surface: A warm plate or cutting board; you can tent with foil to keep warm but not cook further.
Step-by-Step: From Pan to Plate
Step 1: Prep the Steak for Success
Begin by removing the steak from the refrigerator 30 to 60 minutes before cooking. This brings it to room temperature, ensuring even cooking from edge to center. While the steak rests, pat it completely dry with paper towels. Pay special attention to any moisture on the surface; even a little water will hinder browning. Season both sides generously with kosher salt and freshly ground black pepper. The salt not only seasons but also helps dry the surface further through osmosis. Don’t be shy with the seasoning—it’s the foundation of flavor.
Step 2: Get the Pan Sizzling Hot
Place your cast iron skillet over medium-high to high heat. Allow it to preheat for 2-3 minutes until it’s very hot. To test, sprinkle a few drops of water on the pan; they should dance and evaporate instantly. Add about 1 tablespoon of high smoke-point oil and swirl to coat the pan. The oil should shimmer and start to smoke slightly. This indicates the pan is at the right temperature for searing. If the oil smokes excessively, reduce the heat slightly.
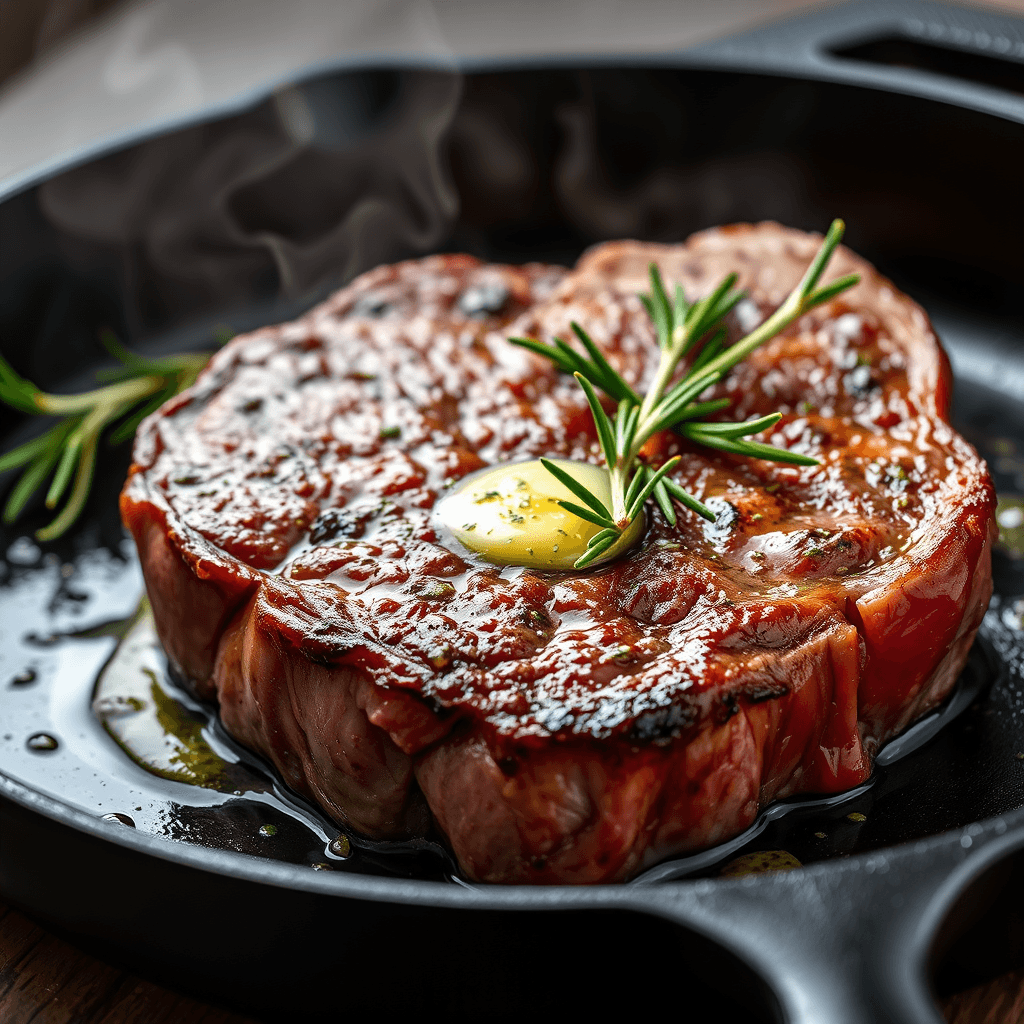
Step 3: Achieve the Perfect Sear
Carefully lay the steak in the pan away from you to avoid oil splatters. You should hear an immediate, vigorous sizzle. This is the sound of a good sear beginning. Let the steak cook undisturbed for 2-4 minutes, depending on thickness. For a 1-inch thick steak, aim for 3 minutes per side for medium-rare. Resist the urge to move or press the steak. After the initial sear, use tongs to flip it once. If your steak has a fat cap, use the tongs to hold it against the pan for 30 seconds to render the fat and crisp it up. Sear the other side for a similar duration.
Step 4: Baste with Garlic Butter
Once both sides are seared, reduce the heat to medium. Add the butter, garlic cloves, herb sprigs, and optional shallot to the pan. As the butter melts, it will begin to foam and brown slightly. Immediately begin basting: tilt the pan and use a spoon to scoop up the foaming butter and pour it over the steak. Continue this motion constantly for 1-2 minutes. The basting not only adds garlic and herb flavor but also helps to cook the edges and top surface gently. Watch for the butter to brown but not burn; if it darkens too quickly, reduce the heat. Use a meat thermometer to check doneness during basting. For medium-rare, remove when the internal temperature reaches 130-135°F, as it will rise 5-10 degrees during resting.
Step 5: The Crucial Rest
Transfer the steak to a plate or cutting board. For larger steaks, you can tent loosely with foil, but avoid sealing it tightly, which can steam the crust. Let the steak rest for at least 5 minutes, ideally 10 minutes for thicker cuts. During this time, the muscle fibers relax and redistribute the juices throughout the meat. If you cut into it too early, the juices will run out onto the cutting board, leaving the meat dry. Trust the process—resting is non-negotiable for juicy results.
Step 6: Slice and Serve
After resting, slice the steak against the grain. The grain refers to the direction of the muscle fibers; cutting across them shortens the fibers and makes each bite more tender. Serve immediately, spooning the pan sauce—the browned butter bits and garlic—over the top. The sauce is a flavor powerhouse and should not be wasted.
Pro Tips for Next-Level Steak
- Use a Meat Thermometer: The best way to ensure perfect doneness is with a meat thermometer. Aim for 130-135°F for medium-rare, 140-145°F for medium.
- Don’t Crowd the Pan: Cook one steak at a time if necessary. Overcrowding lowers the pan temperature and causes steaming, not searing.
- Butter Temperature: Use cold butter added to the pan; it’s less likely to burn than softened butter. Add it after searing to prevent smoking.
- Herb Infusion: Crush the herb sprigs slightly before adding to release their oils.
- Deglaze for Sauce: After removing the steak, add a splash of beef broth or wine to the pan, scrape up browned bits, and reduce for an extra sauce.
Common Mistakes and How to Fix Them
Even experienced cooks can slip up. Here are frequent errors and solutions:
- Steak Sticking to the Pan: Ensure the pan is hot enough and the steak is dry. Use enough oil and let it form a crust before moving.
- Steak Cooking Too Fast on Outside: If the exterior is browning too quickly before the center cooks, reduce the heat slightly or start with a lower temperature.
- Butter Burning: Add butter after reducing heat and baste continuously. If butter browns too fast, add a teaspoon of oil to raise the smoke point.
- Dry Steak: Likely due to overcooking or insufficient resting. Use a thermometer and always rest for 5+ minutes.
- No Crust Formation: The pan wasn’t hot enough or the steak was wet. Always preheat and pat dry.
Serving and Pairing Ideas
Garlic butter steak pairs wonderfully with a variety of sides. Consider:
- Starches: Creamy mashed potatoes, roasted fingerling potatoes, or truffle fries.
- Vegetables: Sautéed green beans with almonds, grilled asparagus, or a fresh spinach salad.
- Condiments: Compound butter (mix butter with herbs and spices), horseradish cream, or a red wine reduction.
- Beverages: Full-bodied red wines like Cabernet Sauvignon, Syrah, or Malbec complement the rich flavors.
Storing and Reheating Leftovers
If you have leftovers, store them in an airtight container in the refrigerator within 2 hours of cooking. They will keep for up to 3 days. To reheat without sacrificing juiciness:
- Skillet Method: Heat a pan over low heat, add a pat of butter, and warm the steak slowly, turning occasionally.
- Oven Method: Preheat oven to 250°F, place steak on a baking sheet, and heat for 10-15 minutes.
- Avoid Microwave: Microwaving can make the steak tough and rubbery. If you must use it, do so on low power and in short bursts.
Note that reheated steak will not be as juicy as fresh, but these methods help minimize dryness.
Understanding Steak Doneness: From Rare to Well-Done
Knowing how to achieve your preferred level of doneness is essential. When pan-searing, the steak continues to cook after removal from the pan due to residual heat (carryover cooking). Therefore, it’s best to remove the steak a few degrees below your target temperature. Here’s a quick guide:
- Rare: Internal temperature 125-130°F. Cool, red center; very soft texture.
- Medium-Rare: 130-135°F. Warm, red center; firm but yielding, often considered ideal for flavor and juiciness.
- Medium: 140-145°F. Pink, warm center; slightly firmer.
- Medium-Well: 150-155°F. Slightly pink, firm; less juicy.
- Well-Done: 160°F and above. Brown throughout, dry and tough; not recommended for pan-searing.
Using a meat thermometer is the only way to guarantee accuracy. Insert it into the thickest part of the steak, avoiding bone or fat.
Conclusion: Your Journey to Steak Perfection
Pan-seared garlic butter steak is a dish that impresses with minimal effort when you know the techniques. By focusing on a hot pan, a dry steak, precise timing, and a generous butter baste, you can achieve that elusive combination of a crisp crust and tender interior every time. Remember to let the steak rest—it’s the simplest step that makes the biggest difference. With this guide, you’re equipped to cook a steak that rivals any restaurant. So gather your ingredients, fire up the skillet, and enjoy the delicious rewards of your newfound skill. Here’s to many perfectly juicy steaks in your future!