Juicy Bone-In Chicken Thighs with Garlic Butter Air Fryer Recipe
Introduction
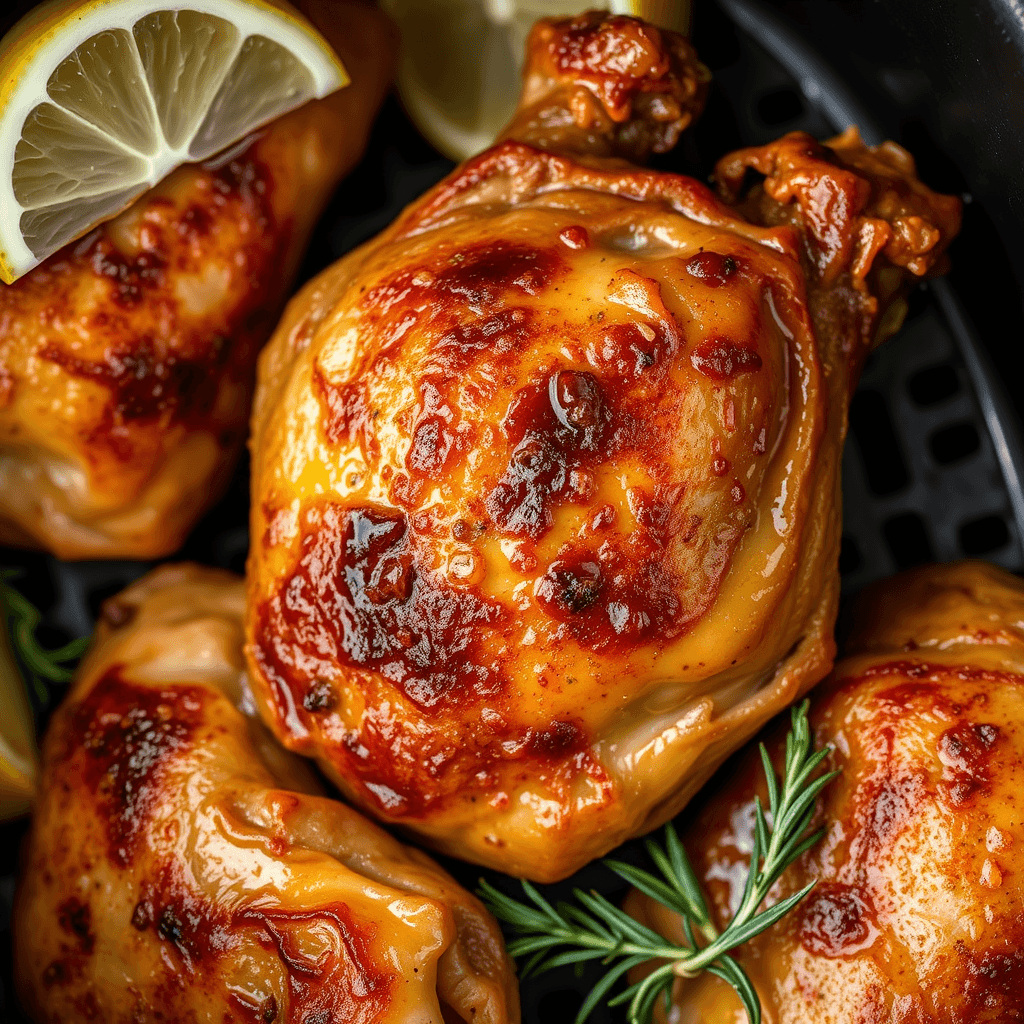
If you’re searching for the ultimate comfort food that’s both incredibly easy and deeply satisfying, look no further than these Juicy Bone-In Chicken Thighs with Garlic Butter cooked in an air fryer. Imagine biting into a piece of chicken with a golden, crispy skin giving way to tender, succulent meat, all coated in a luscious garlic butter sauce. The air fryer makes it possible to achieve that perfect crisp without the mess and excess oil of traditional frying. This recipe is designed for home cooks of all skill levels, whether you’re a busy parent looking for a quick weeknight dinner or a food enthusiast craving that restaurant-quality dish with minimal effort. In just about 20 minutes, you can have a flavorful, protein-packed meal that will become a staple in your rotation. Keep reading to discover why bone-in chicken thighs are the secret weapon for air fryer success and how a few simple ingredients come together to create something truly magical.
Chicken thighs are not only budget-friendly but also packed with flavor due to their higher fat content compared to breast meat. The bone adds extra depth of flavor and helps retain moisture during cooking, ensuring each bite stays juicy. When you pair that with the air fryer’s rapid hot air circulation, you get evenly cooked meat with a skin that’s irresistibly crunchy. The garlic butter sauce, made with melted butter, fresh garlic, and a hint of herbs, elevates the dish to new heights, infusing every nook with aromatic richness. Plus, the recipe is versatile – serve it with your favorite sides like roasted vegetables, mashed potatoes, or a fresh salad. Whether you’re cooking for two or feeding a crowd, this dish delivers consistent results that will have everyone asking for the recipe.
Why Bone-In Chicken Thighs Are Perfect for Air Frying
Bone-in chicken thighs are a cut above when it comes to air frying. The bone conducts heat slowly, allowing the meat to cook evenly from the inside out while the skin crisps up beautifully. The extra fat in the thigh keeps the meat moist, preventing the dryness that can sometimes occur with leaner cuts. This makes them forgiving even if you overcook slightly – the thigh remains forgivingly tender. Additionally, the skin acts as a natural barrier, locking in juices and creating a textural contrast that’s simply irresistible. When you use an air fryer, the hot air circulates around the chicken, reaching all surfaces and rendering the fat to produce a crackling skin without the need for deep frying. This method also reduces the overall fat content while maximizing flavor. For anyone seeking a healthier take on fried chicken without sacrificing taste, bone-in thighs in the air fryer are the way to go.
The Air Fryer Advantage
Air fryers have taken the culinary world by storm, and for good reason. They work by circulating superheated air at high speed, which cooks food evenly and quickly while creating a crispy exterior. This technology mimics deep frying but uses little to no oil, making it a healthier alternative. For chicken thighs, the air fryer’s basket allows excess fat to drip away, further reducing greasiness. The appliance is also incredibly convenient – it preheats faster than an oven, cooks food in a fraction of the time, and cleanup is a breeze thanks to non-stick coatings. Moreover, the compact size means it doesn’t heat up your entire kitchen, a bonus during hot summer months. Whether you’re a novice cook or a seasoned chef, the air fryer simplifies the cooking process and delivers consistent, delicious results every time. In short, it’s a game-changer for making crispy chicken thighs without the hassle.
Ingredients You’ll Need
To create this dish, gather the following simple ingredients. Most are pantry staples, so you might already have them on hand.
- 4 bone-in, skin-on chicken thighs (about 1.5 pounds)
- 2 tablespoons olive oil
- 1 teaspoon salt
- ½ teaspoon black pepper
- 1 teaspoon smoked paprika
- ½ teaspoon garlic powder
- ¼ teaspoon onion powder
- 4 tablespoons unsalted butter
- 4 cloves garlic, minced
- 1 tablespoon fresh parsley, chopped
- 1 teaspoon lemon juice
- Optional: pinch of red pepper flakes for a little heat
Step-by-Step Preparation
1. Pat the Chicken Dry
Start by removing any excess moisture from the chicken thighs. Use paper towels to pat them dry thoroughly, especially on the skin side. This is a crucial step because dry skin crisps up much better in the air fryer. If the skin is wet, it will steam rather than roast, leading to rubbery texture. After drying, place the thighs on a clean plate or cutting board, ready for seasoning.
2. Season Generously
In a small bowl, combine the salt, pepper, smoked paprika, garlic powder, and onion powder. Drizzle the olive oil over the chicken thighs, then sprinkle the spice mixture evenly on all sides. Use your hands to rub the spices into the meat, ensuring full coverage. Don’t forget to season underneath and on the skin. The oil helps the spices adhere and promotes even browning. For an extra flavor boost, you can let the seasoned chicken rest for 15–20 minutes at room temperature while you preheat the air fryer, though this is optional.
3. Preheat the Air Fryer
Preheating your air fryer is recommended to get that immediate sizzle. Set the temperature to 400°F (200°C) and let it run for about 5 minutes. If your model doesn’t have a preheat function, you can simply run it empty for 5 minutes. While it preheats, you can prepare the garlic butter sauce – melt the butter in a small saucepan over low heat, add the minced garlic, and sauté for about 1 minute until fragrant. Stir in the lemon juice and parsley, then set aside.
4. Cook the Chicken Thighs
Carefully place the chicken thighs skin-side down in the air fryer basket, making sure they are not overlapping; if necessary, cook in batches. Set the air fryer to 380°F (193°C) and cook for 12–15 minutes, flipping halfway through. The exact time depends on the size of your thighs and your air fryer model. Use a meat thermometer to check for doneness – the internal temperature should reach 165°F (74°C) at the thickest part, avoiding the bone. The skin should be golden brown and crispy. If you like extra crisp, you can increase the temperature to 400°F for the last 2 minutes.
5. Glaze with Garlic Butter
Once the chicken is cooked, transfer the thighs to a serving platter. While they’re still hot, spoon the prepared garlic butter sauce over each piece, allowing it to melt and soak into the skin. The residual heat will make the butter shine and infuse the chicken with garlicky goodness. Sprinkle with additional chopped parsley and red pepper flakes if using. Serve immediately to maintain crispiness.
Serving Suggestions
These garlic butter chicken thighs are incredibly versatile and pair well with a variety of sides. For a classic comfort meal, serve them over a bed of buttery mashed potatoes or creamy polenta. The rich sauce drizzles beautifully over the carbs. If you’re looking for something lighter, a fresh green salad with a lemon vinaigrette offers a bright contrast to the richness. Steamed or roasted vegetables like broccoli, asparagus, or green beans add color and nutrition. You can also shred the chicken and use it in tacos, wraps, or sandwiches for a delicious handheld option. For a complete low-carb dinner, pair with cauliflower rice or zucchini noodles. Whatever you choose, the chicken thighs will be the star of the plate.
Tips for the Best Juicy Chicken Thighs
- Dry the skin thoroughly before seasoning to ensure maximum crispiness.
- Don’t skip the resting step after seasoning – it helps the flavors meld and brings the chicken to room temperature for more even cooking.
- Use a meat thermometer to avoid overcooking; chicken thighs are forgiving but still best at 165°F.
- If your air fryer is small, cook in a single layer without crowding; overcrowding leads to steaming instead of crisping.
- For extra flavor, add a dash of smoked paprika or cayenne to the spice rub.
- After cooking, let the chicken rest for 5 minutes before glazing; this retains juices.
- Make the garlic butter sauce right before serving so it’s warm and liquid.
- If you love a citrus note, zest a little lemon into the butter sauce.
- For a healthier version, you can reduce the butter and add a splash of chicken broth.
- Always clean the air fryer basket after use to maintain its non-stick surface.
Storing and Reheating Leftovers
If you have leftovers, store the chicken thighs in an airtight container in the refrigerator for up to 3 days. To reheat, place them back in the air fryer at 350°F for 3–4 minutes, or until warmed through and the skin regains its crispiness. Avoid using the microwave, as it will make the skin soggy. You can also enjoy the cold chicken sliced over a salad – it’s delicious either way.
Conclusion
These Juicy Bone-In Chicken Thighs with Garlic Butter are a testament to how simple ingredients and the right technique can yield extraordinary results. The air fryer makes the process quick, clean, and health-conscious while delivering that coveted crunch. With just a handful of pantry staples, you can create a meal that feels indulgent yet is surprisingly light. Give this recipe a try for your next dinner – it’s bound to become a family favorite and a go-to for any occasion. Enjoy the combination of tender meat, crispy skin, and buttery garlic sauce that makes every bite memorable.