Perfect Garlic Butter Grilled Chicken Breast Recipe: Juicy & Tender Every Time
Introduction: The Ultimate Grilled Chicken Solution
Grilled chicken breast is a kitchen staple for health-conscious and flavor-loving cooks alike, yet it consistently ranks as one of the most challenging proteins to perfect. How many times have you sliced into a beautifully grilled breast only to find it dry, tough, and lacking in juiciness? The frustration ends today. This garlic butter grilled chicken breast recipe is engineered to deliver consistently moist, tender, and flavorful results, transforming your grill into a tool for creating restaurant-quality meals at home. By combining proven techniques like brining, precise temperature control, and a luxurious garlic butter basting sauce, you’ll never again serve dry chicken. Whether you’re firing up the barbecue for a summer cookout or seeking a quick weeknight dinner, this guide is your ticket to grilling success.
In the following sections, we’ll dissect the science behind juicy chicken, provide a detailed ingredient list, walk through each step with clarity, and share invaluable tips for customization, serving, and storage. Designed for all skill levels, this recipe emphasizes method over complexity, ensuring that even novice grillers can achieve mastery. Get ready to elevate your grilling game and delight your taste buds with every succulent bite.
Understanding Why Chicken Breasts Dry Out
To solve the problem, we must first understand it. Chicken breasts are exceptionally lean, containing minimal fat compared to dark meat or other proteins. During cooking, muscle fibers contract and expel moisture. If heated too quickly or for too long, these fibers tighten excessively, squeezing out nearly all the juices and leaving the meat stringy and dry. High, direct heat from grilling accelerates this process. The goal, therefore, is to minimize moisture loss while building flavor and achieving a desirable char. This recipe tackles the issue through two core strategies: pre-cooking moisture retention (brining) and in-cooking protection (garlic butter basting).
Brining: The Foundation of Juiciness
Brining is a simple process of soaking meat in a saltwater solution. The salt alters the protein structure, allowing the muscle fibers to absorb and hold more water during the cooking process. Even a brief 30-minute brine can significantly increase moisture content. For this recipe, a basic brine of kosher salt and water is sufficient, but adding sugar, herbs, or citrus can introduce subtle flavors that penetrate the meat. The key is to rinse and thoroughly pat the chicken dry after brining, ensuring a dry surface for optimal searing.
Garlic Butter Basting: Flavor and a Protective Barrier
While brining works from the inside, garlic butter basting protects from the outside. As the butter melts on the hot grill, it creates a temporary fat barrier that slows direct heat penetration, reducing the risk of overcooking the exterior before the interior reaches temperature. Simultaneously, the garlic, herbs, and aromatics infuse the chicken with complex flavor. Basting during the final minutes of cooking ensures the sauce caramelizes slightly, adding a glossy, appetizing finish.
Ingredients: Building Blocks for Success
Quality ingredients are non-negotiable for the best results. Opt for fresh, high-quality chicken breasts and use unsalted butter to control sodium levels. Fresh herbs will elevate the dish, though dried can substitute in a pinch.
- For the Chicken:
- 4 boneless, skinless chicken breasts (6-8 ounces each), trimmed of excess fat
- 2 tablespoons olive oil
- 1 teaspoon kosher salt (plus more to taste)
- 1/2 teaspoon freshly ground black pepper
- For the Garlic Butter Sauce:
- 1/2 cup (1 stick) unsalted butter, softened at room temperature
- 6 cloves garlic, minced (about 2 tablespoons)
- 3 tablespoons fresh flat-leaf parsley, finely chopped
- 1 tablespoon fresh lemon juice (about 1/2 lemon)
- 1 teaspoon dried thyme or 1 tablespoon fresh thyme leaves
- Optional: 1/4 teaspoon red pepper flakes or 1 teaspoon smoked paprika
- For the Brine (if using):
- 1/4 cup kosher salt
- 4 cups cold water
- Optional additions: 2 tablespoons brown sugar, 4 sprigs fresh thyme, 1 lemon sliced, 4 cloves garlic (lightly crushed)
Note: Brining is highly recommended but can be skipped if time is limited. If skipping, ensure thorough seasoning and consider a longer rest at room temperature before grilling. Always use softened butter for easy mixing.
Detailed Step-by-Step Instructions
Follow these steps meticulously for guaranteed results. Preparation is key—mise en place saves time and stress once the grill is hot.
Step 1: Prepare the Chicken for Even Cooking
Uniform thickness is critical. Place each breast between two sheets of plastic wrap or inside a resealable bag. Using a meat mallet or the flat side of a heavy skillet, gently pound the thicker end until the entire breast is about 1/2 inch thick. This ensures every part cooks simultaneously. Remove the wrap, then pat the chicken completely dry with paper towels—moisture on the surface hinders browning and promotes steaming.
Step 2: Brine the Chicken (Optional but Worth It)
In a large bowl or zip-top bag, dissolve salt in water. Add any optional brining ingredients. Submerge the chicken breasts, ensuring they are fully covered. Refrigerate for 30 minutes to 2 hours. For a quick brine, 30 minutes is effective. After brining, rinse each breast under cold water to remove excess salt, then pat dry meticulously with paper towels. This step can be done up to 2 hours ahead; keep chicken covered in the fridge if not grilling immediately.
Step 3: Season and Bring to Temperature
Rub the chicken breasts with olive oil. Season generously on all sides with kosher salt and black pepper. If you skipped the brine, err on the side of more seasoning. Allow the chicken to sit at room temperature for 15-20 minutes while you preheat the grill. This equilibration prevents the cold center from delaying cooking and promotes even results.
Step 4: Make the Garlic Butter Sauce
In a small bowl, combine the softened butter, minced garlic, chopped parsley, lemon juice, and thyme. Mix with a fork or spoon until smooth and well blended. Add optional red pepper flakes or smoked paprika if desired. Taste and adjust—remember the chicken is seasoned. Set aside at room temperature. This sauce can be made up to 1 day ahead; store covered in the refrigerator and bring to room temp before using.
Step 5: Preheat and Prepare the Grill
Proper grill heat is essential. Preheat your gas or charcoal grill to medium-high (400-450°F). For gas, light all burners and close the lid for 10-15 minutes. For charcoal, arrange briquettes on one side for a two-zone fire (direct and indirect heat). Once hot, scrub the grates clean with a stiff brush. Then, oil the grates: fold a paper towel, dip in oil, and grip with tongs to wipe across the bars. This prevents sticking and aids in clean grill marks.
Step 6: Grill the Chicken
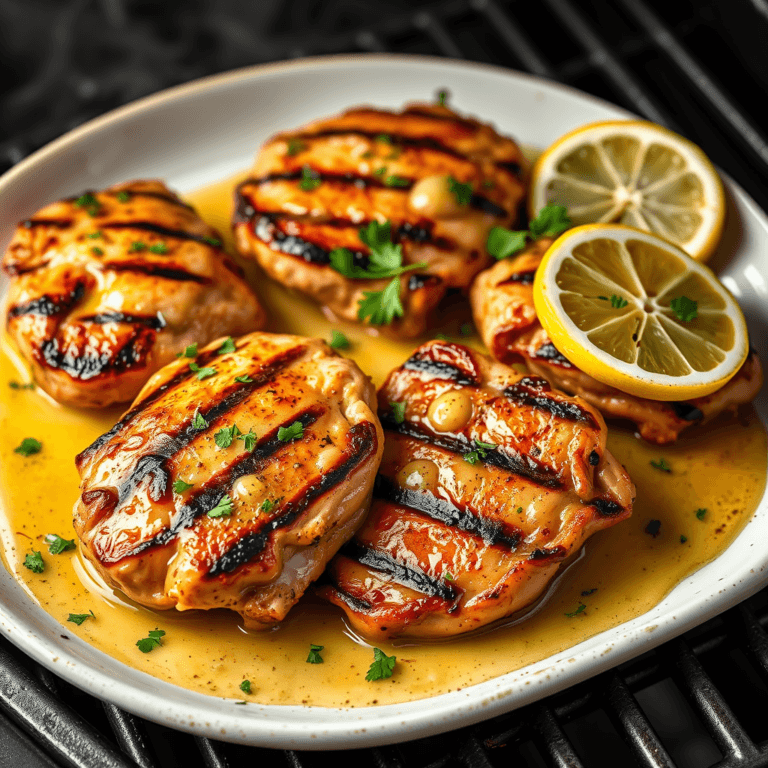
Place chicken breasts on the hottest part of the grill (direct heat). Grill for 4-6 minutes on the first side without moving, until distinct grill marks appear and the chicken releases easily. Flip using tongs—never a fork, which pierces and drains juices. Immediately baste the top side generously with garlic butter sauce. If using a two-zone setup, move chicken to the cooler side (indirect heat) after flipping. If a single zone, reduce heat to medium. Continue grilling for another 4-7 minutes, basting occasionally with more butter. Total time depends on thickness; aim for an internal temperature of 160°F, as carryover cooking will raise it to the safe 165°F. Always use an instant-read thermometer inserted into the thickest part, avoiding bone.
Step 7: Rest, Slice, and Serve
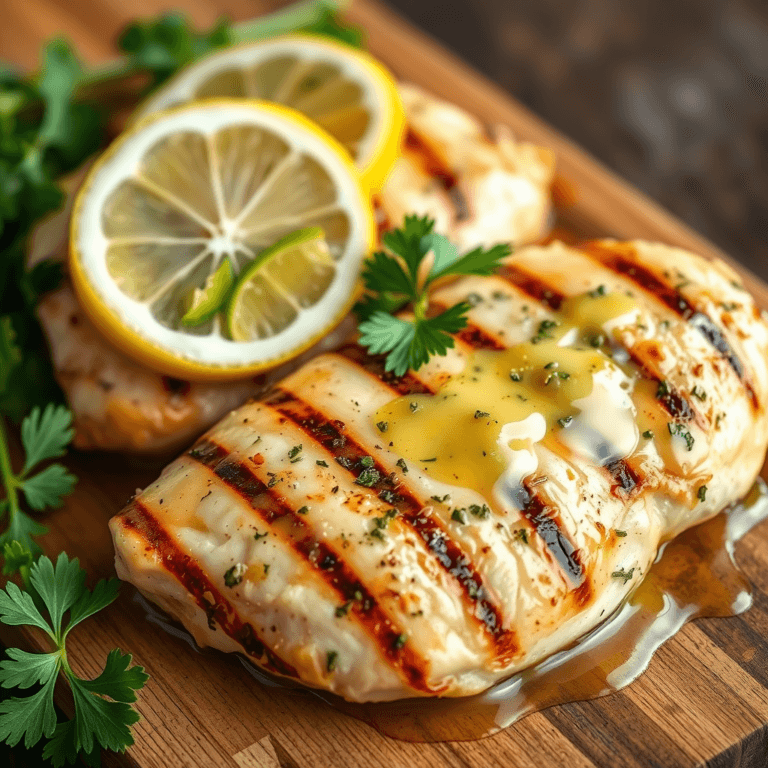
Transfer chicken to a plate or cutting board. Tent loosely with foil and let rest for 5-10 minutes. This crucial step allows juices to redistribute. Slice against the grain for maximum tenderness. Drizzle with any remaining garlic butter sauce and sprinkle with fresh parsley. Serve immediately with your choice of sides.
Essential Pro Tips for Consistent Perfection
Incorporate these expert insights to refine your technique and adapt to any situation.
- Thermometer is Non-Negotiable: Guessing doneness leads to errors. Invest in a reliable instant-read thermometer. Target 160°F on the grill, then rest to 165°F.
- Pound for Uniformity: Uneven thickness is the primary cause of uneven cooking. Always pound to 1/2-inch thickness.
- Pat Dry Thoroughly: After brining or washing, use multiple paper towels to ensure a bone-dry surface for a superior sear.
- Master Heat Zones: Use direct heat to sear and develop crust, then indirect heat to cook through without burning. On single-zone grills, move chicken to a less hot area after flipping.
- Baste During the Last Minutes: Basting too early can cause the butter to burn. Apply generously during the final 2-3 minutes of cooking.
- Resting Time is Sacrosanct: Cutting into hot chicken releases all the trapped juices. Wait at least 5 minutes.
- Adjust for Size: Larger breasts (over 8 ounces) may need a minute or two more per side or a gentle butterfly cut to create two thinner pieces.
- Clean Grill, Perfect Marks: A clean grill grate prevents sticking and ensures beautiful, even grill lines.
Delicious Variations to Keep It Fresh
This recipe is a canvas for creativity. Experiment with these flavor twists.
- Citrus Burst: Add zest of 1 lemon and 1 lime to the butter, and increase lemon juice to 2 tablespoons.
- Herb Garden: Mix in 1 tablespoon each of chopped rosemary, basil, and dill with the parsley.
- Spicy Garlic Butter: Stir in 1 minced jalapeño (seeds removed) and a dash of cayenne pepper.
- Cheesy Indulgence: Blend 1/4 cup finely grated Parmesan or Asiago cheese into the softened butter.
- Honey-Mustard Glaze: Replace lemon juice with 1 tablespoon Dijon mustard and 1 tablespoon honey.
- Smoky Chipotle: Use chipotle powder instead of thyme, and add 1 teaspoon adobo sauce from canned chipotles.
Perfect Side Dishes to Complete the Meal
The versatility of garlic butter chicken makes it a centerpiece for countless cuisines. Pair it with any of these sides.
- Grilled Vegetables: Zucchini, summer squash, bell peppers, and red onion slices, tossed in olive oil, salt, and pepper, grilled until tender-crisp.
- Fresh Green Salad: Mixed greens with sliced cucumber, cherry tomatoes, and a lemon-herb vinaigrette to cut through the richness.
- Starchy Comforts: Garlic mashed potatoes, parmesan roasted potatoes, or a wild rice pilaf.
- Grains and Legumes: Lemon-herb quinoa, cilantro lime rice, or a hearty chickpea salad.
- Bread: Crusty baguette slices or garlic knots to soak up every drop of buttery sauce.
For drinks, consider a crisp white wine (Pinot Grigio, Sauvignon Blanc), a light lager, or freshly brewed iced tea.
Storing and Reheating Leftovers
Store cooked chicken in an airtight container, pouring any remaining garlic butter sauce over the top to maintain moisture. Refrigerate for 3-4 days. For best results, reheat gently: Place chicken in a skillet over medium-low heat, add a tablespoon of water or chicken broth, cover, and warm for 3-5 minutes, flipping once. Alternatively, reheat on a preheated grill over indirect heat for a few minutes. Avoid microwaving on high power, which renders the chicken rubbery. Leftover chicken can also be chilled and used in salads, wraps, or soups.
Nutritional Profile and Dietary Notes
This recipe is a protein powerhouse. A 6-ounce serving provides approximately 35-40 grams of lean protein with minimal carbs. The garlic butter contributes healthy fats and enhances the absorption of fat-soluble vitamins from the herbs. Garlic offers allicin and antioxidants, while parsley is rich in vitamins K, A, and C. The dish is naturally gluten-free and can be adapted for keto, paleo, and Whole30 diets by ensuring all ingredients are compliant (e.g., use ghee instead of butter for Whole30). For a lower-fat version, reduce butter by half and supplement with olive oil; the flavor will remain delightful.
Common Grilling Mistakes and How to Avoid Them
Even with a great recipe, errors can occur. Steer clear of these pitfalls:
- Overcooking: Rely on a thermometer, not time. Chicken carries over 5-10°F while resting, so pull it off at 160°F.
- Skipping the Pat Dry: Wet chicken steams instead of sears, resulting in pale, soggy skin.
- Piercing with Forks: Use tongs exclusively to flip. Each puncture releases precious juices.
- Grilling Cold Chicken: Always let chicken sit at room temperature for 15-20 minutes pre-grill. Cold meat cooks unevenly.
- Inadequate Grill Prep: A dirty or cold grill causes sticking and poor sear marks. Always preheat and clean.
- Basting Too Early: Applying butter at the start can cause burning due to milk solids. Baste in the last few minutes.
- Neglecting Rest Time: Impatience here wastes all your efforts. Resting is mandatory for juiciness.
Conclusion: Your Journey to Grilling Mastery
Armed with this comprehensive guide, you are now equipped to consistently grill chicken breasts that are exquisitely juicy, tender, and bursting with garlic butter flavor. The trifecta of proper preparation (pounding and brining), precise grilling (temperature control and basting), and proper resting culminates in a foolproof method that works every time. This recipe is not just about feeding your family; it’s about building confidence in the kitchen and creating moments of culinary joy. So, ignite your grill, follow these steps, and prepare for compliments. We invite you to share your successes and questions in the comments below—happy grilling!